Showing posts with label Cake. Show all posts

Tuesday, December 15, 2009

Gingerbread Apple Upside-down Cake and Cinnamon Buns

Another new post in the same week you ask? My Answer? YES. And in fact, this is a post so delicious and so very wintery, that you need to get ready. Prepare yourself. Get out your hot apple cider, hot chocolate, start a fire in the fireplace (or if you don't have a fireplace, at least light this candle), and put on some comfy house slippers. Today we've got gingerbread apple upside-down cake and cinnamon buns. mmm, spicy and sweet and perfect for cold weather.

Gingerbread Apple Upside-down Cake - adapted from SmittenKitchen
Ingredients:
Topping
4 tablespoons butter, plus extra for greasing pan
1/2 cup dark brown sugar
Pinch of salt
4 apples (about 1 3/4 pounds), peeled, cored and cut into 1/4-inch wedges

Batter
1/2 cup (1 stick or 4 ounces) butter, at room temperature
1/2 cup sugar
1 large egg
1/3 cup dark molasses
1/3 cup honey
1 cup buttermilk
2 1/4 cups flour
1 teaspoon baking soda
1/2 teaspoon salt
1 teaspoon ground ginger
1 teaspoon cinnamon
Very softly whipped cream

Instructions:
Start with the topping
1. Preheat the oven to 325°F. Grease a 10-inch cake pan. Melt butter in a small saucepan.

2. Add brown sugar and simmer over moderate heat, stirring, four minutes, then swirl in salt. Remove from heat and pour into the bottom of your cake pan.

3. Make circles of overlapping apple slices on top of the caramel. Chop any remaining slices and place them in the gaps.

For the batter:
1. Using a mixer, blend 1/2 cup butter and the sugar on medium-low speed. Increase the speed to high and cream until light and fluffy.

2. In a medium bowl, whisk together the egg, molasses, honey and buttermilk. In a separate bowl, sift together the flour, baking soda, salt, ginger and cinnamon. Alternate mixing the flour and molasses mixtures into the butter mixture, adding the next once the last has been incorporated.


3. Pour the batter into the pan. Bake at least 45 to 50 minutes or until a wooden pick inserted into the center of the cake comes out clean. Let cool on a rack for 10 to 15 minutes, then turn out onto a platter and enjoy!


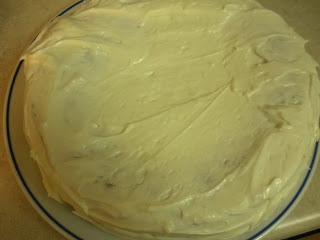
(Yes, I realize it's not the most beautiful photography, but that didn't stop us destroying half of this cake in one night).

For the Cinnamon Buns (careful - they're addicting) - about 18 buns, also from SmittenKitchen

For the Dough you'll need:
1 cup whole milk
3 tablespoons unsalted butter
3 1/2 cups (or more) unbleached all purpose flour, divided
1/2 cup sugar
1 large egg
2 1/4 teaspoons rapid-rise or instant yeast (from 1 envelope yeast)
1 teaspoon salt
Nonstick vegetable oil spray

And for the Filling:
3/4 cup (packed) golden brown sugar
2 tablespoons ground cinnamon
1/4 cup (1/2 stick) unsalted butter, at room temperature
Pinch of salt
Optional: Pecans and Raisins (quantity as desired) 

Glaze:
4 ounces cream cheese, at room temperature
1 cup powdered sugar
1/4 cup (1/2 stick) unsalted butter, room temperature
1/2 teaspoon vanilla extract

Instructions for the Dough:
1. Combine milk and butter in glass measuring cup. Microwave on high until butter melts and mixture is just warmed to 120°F to 130°F, about 30 to 45 seconds. Pour into bowl of stand mixer fitted with paddle attachment.

2. Add 1 cup flour, sugar, egg, yeast, and salt. Beat on low speed 3 minutes, stopping occasionally to scrape down sides of bowl. Add additional 2 1/2 cups flour. Beat on low until flour is absorbed and dough is sticky, scraping down sides of bowl. If dough is very sticky, add more flour by tablespoonfuls until dough begins to form ball and pulls away from sides of bowl.

3. Turn dough out onto lightly floured work surface and knead until smooth and elastic, adding more flour if sticky, about 8 minutes. (I used a KitchenAid dough hook instead) Form into ball.

4.  Lightly oil large bowl with nonstick spray. Transfer dough to bowl, turning to coat. Cover bowl with plastic wrap, then kitchen towel. Let dough rise in warm draft-free area until doubled in volume, about 2 hours.

Instructions filling/making the buns:
1. Mix brown sugar, cinnamon and pinch of salt in medium bowl.

2. Press down dough. Transfer to floured work surface. Roll out to 15×11-inch rectangle. Spread butter over dough, leaving 1/2-inch border. Sprinkle cinnamon mixture evenly over butter. Sprinkle on pecans and raisins as/if desired.

3. Starting at the longer side, roll dough into log, pinching gently to keep it rolled up. With seam side down, trim ends straight if they are uneven and cut remaining dough crosswise with thin sharp knife (i used my bread knife) into 18 equal slices (each about 1/2 to 3/4 inch wide). We baked the end pieces in a tiny loaf pan so as not to waste them.


4. Spray two 9-inch glass baking dishes (rectangle or square is fine, an 8-inch square metal pan worked just fine, too) with nonstick spray. Divide rolls between baking dishes, arranging cut side up (there will be almost no space between rolls). Cover baking dishes with plastic wrap, then kitchen towel. Let dough rise in warm draft-free area until almost doubled in volume, 40 to 45 minutes. Don't skip on this like I did, your rolls just won't come out as pretty, though they will taste just as good.


5. Position rack in center of oven and preheat to 375°F. Bake rolls until tops are golden, about 20 minutes. Remove from oven and invert immediately onto rack. Cool 10 minutes. Turn rolls right side up.


Finally, Glaze the rolls: Combine cream cheese, powdered sugar, butter, and vanilla in medium bowl. Using electric mixer, beat until smooth. Spread glaze on rolls. Serve warm or at room temperature.


SmittenKitchen says "These buns were best the day they were baked. The second day, they were on the tough side. If you anticipate wanting them over a few days, glaze them to order, heating the buns beforehand to soften them up" - but you know what? Justin and I ate them for like 3 days - cold and preglazed and all.

Monday, November 16, 2009

Spice Cake with Caramelized Pears and Maple Buttercream Icing

I'm not sure how many of you heard, but sadly, Gourmet Magazine has published its last issue. This recipe is one i found in the last ever issue, and it is amazing. Gourmet Magazine, you will be missed.


So as I've mentioned before we're a little broke right now, therefore, instead of giving friends crappy $10 gifts they'll throw away after the obligatory month of display, I'm baking them birthday cakes and they get to take the left-overs. So far - no complaints. My friend Kristy had a birthday last week and managed to get in to Austin and I offered her a cake of her choice. She asked me "umm... is there anything with cinnamon in it?" and I immediately went to my issue of Gourmet Magazine and pulled out this Spice cake. It is, without a doubt, the most complicated recipe I've ever posted. But believe me, it's worth the trouble.


A few notes on the maple buttercream icing: Buttercream icing is actually one of the hardest things I think I've ever made. It's very finicky and you have to be very careful to follow these instructions perfectly, or i promise you will end up with buttercream soup. Also, real buttercream icing has uncooked eggs in it (the eggs do get heated, but not thoroughly enough to kill all possible bacteria), if you are anywhere close to as paranoid as I am then I highly suggest using pasteurized eggs. Also, if you make your buttercream icing the day before you can refrigerate it, however, it will need to be revivied. Buttercream icing can actually be refrigerated up to 1 week in advance. The trick to reviving it is to bring it all the way to room temperature (you can put it over a warm water bath) then to whip the hell out of it. Seriously, on super high speed, for at least 2 or 3 minutes, possibly longer.

For Spice Cake:
2 2/3 cups all purpose flour
2 1/2 tsp baking powder
1/2 tsp salt
2 tsp cinnamon
1 tsp ground ginger
1/2 tsp grated nutmeg
1/4 tsp ground cloves
1 cup whole milk
1 tsp pure vanilla extract
2 sticks unsalted butter, softened
2/3 cup granulated sugar
2/3 cup packed dark brown sugar
5 large eggs

For Caramelized Pears
2 1/4 lb Bartlett or Bosc pears (about 5)
1/2 stick unsalted butter
1 tbsp granulated sugar
1 tbsp fresh lemon juice
2 tbsp brandy

For Maple Buttercream
4 large egg whites at room temp for about 30 minutes
1/2 tsp cream of tartar
1/4 tsp salt
1/4 cup maple sugar (this can be found at Whole Foods, although it's a little expensive, you can also make this, ask me if you're curious)
1 1/3 cups pure maple syrup
4 sticks unslated butter, cut into tablespoons and softened.

The Gourmet Magazine suggests using 3 (8-inch) round cake pans, but I didn't have any, so I used 2 9-inch round cake pans and adjusted the cooking time slightly.

Spice Cake:
Preheat the oven to 350 with rack in the middle and butter and flour your cake pans. (Cake can be made 1 day ahead and wrapped in plastic wrap, at room temp).
Whisk together flour, baking powder, salt, and spices in a large bowl. In a separate small bowl stir together milk and vanilla.
Beat butter and sugars with an electric or stand mixerat medium-high speed until pale and fluffy, about 3 to 5 minutes. Then add eggs 1 at a time, beating well after each addition. At low speed mix in flour mixture in 3 batches, alternating with milk/vanilla mixture (beginning and ending with the flour mixture) and mixing until just combined.
Divide batter among pans, smoothing tops, then rap the pans on the counter to eliminate any air bubbles (or you can have fun and make a lot of noise like me by dropping them on the counter from several inches up). Bake until pale golden and a wooden pick inserted into center of cakes comes out clean, 25 to 30 minutes for the 3 8-inch pans, or about 20 minutes for the 2 9-inch pans. Cool cakes in pans on racks for about 10 minutes then run a knife around the edge of pans and invert cakes onto racks. Turn right-side-up and cool completely.


Caramelized Pears:
Peel and core pears, then coarsely chop (or make your husband/boyfriend/significant other do this).
Heat butter in a 12-inch heavy skillet over medium-high heat until foam subsides*, then saute pears, stirring occasionally, until just beginning to brown, 2 to 3 minutes.Stir in the sugar, lemon juice, and brandy - cook over high heat, stirring, until juices are deep golden and pears are tender, about 5 to 8 minutes.

*really that means until the butter has just completely melted, otherwise you'll burn it and have to toss out the first try like I did.


Maple Buttercream:
(just a reminder, please, please, make sure your butter is completely at room temp)
Beat egg whites with cream of tartar and salt using cleaned beaters at medium speed until they just hold soft peaks. Add maple sugar a little at a time, beating, then continue to beat until whites just hold stiff peaks.
Boil maple syrup in a small heavy saucepan over medium heat, undisturbed, until it reaches "soft-ball stage" (That's around 238 to 242 on a candy thermometer) - about 3 to 7 minutes.
With mixer at a low speed immediately pour hot syrup in a very slow stream down side of bowl in to egg whites, then beat at high speed scraping down side of bowl occasionally with a rubber spatula, until meringue is cool to the touch, about 6 minutes. It's really important that the meringue is cool, if you need to, put the bottom of the bowl over an ice bath for just a minute or two.
At medium speed add butter 1 tbsp at a time, beating well after each addition (if the buttercream is still soupy after about half the butter is added, then it's time for the ice bath). Continue beating until buttercream is smooth - it's okay if the mixture looks a little curdled before all the butter is added, but it should come together before the beating is finished.


To assemble the cake:
Put 1st layer on serving plate (can use pieces of aluminum foil to prevent getting icing on the plate) then spread with buttercream and top with pear filling (half or all depending on how many cakes you made). Top with second cake layer and either frost cake with remaining butter cream, or repeat with another layer.


Sunday, November 1, 2009

Angel Food Cake

Friday the 30th of October was my little sister's 19th birthday, and being a little broke Justin and I couldn't afford to get her the absolutely amazing gift she deserves, so I offered to make her a cake, any cake. Her choice was Angel Food, which I had never tried before. I actually really didn't know anything about angel food cakes other than that they had a lot of egg whites. Turns out "a lot" means 12 egg whites. And, I thought that I had lots of eggs (we had an 18 carton), unfortunately 9 of the 18 eggs were broken. So, half way through the cake when I started discovering that I didn't have 12 eggs, Justin had to run to the store for me.

The cake actually turned out fabulous, and we chose to do 'buffet' style toppings (everyone ended up using all 3 toppings anyway). I made fresh whipped cream, sliced up a carton of strawberries, and because blackberries were on sale for .69 cents a half-pint, blackberry coulis. YUM.


Angel Food Cake

1 cup cake flour
1 1/2 cups granulated sugar, divided
12 egg whites, very cold
1 1/2 tsp cream of tartar
1 1/2 tsp vanilla extract
1 tsp almond extract
1/2 tsp salt

*Make sure all of your tools, including your pan, mixer, etc, are clean and completely free of any oil. Even a trace of oil will ruin your cake.

1. Sift together cake flour with 3/4 cup of the granulated sugar

2. In a mixer fitted with a whip attachment, whip the egg whites, cream of tartar, vanilla and almond extracts and salt on high speed until soft peaks form. It will take around 4 minutes. With the mixer still running slowly add in remaining 3/4 cup sugar, beating until stiff, glossy peaks form. Using your trusty rubber spatula gradually fold in flour mixture until just incorporated.


3.  Pour the batter into a angel food cake pan/ tube pan (no oil or grease!) and smooth the top, carefully smoothing out any bubbles. Bake in a preheated oven until golden brown and top springs back when lightly touched. It should take about 40 to 45 minutes. Invert your pan and let the cake cool completely upside-down. It will probably just sort of fall off the tube pan when cool, but if it doesn't, use a rubber spatula to separate it from the pan. I had no trouble with the sides sticking, but I did need to run a spatula under the bottom of the cake.

As far as toppings for the angel food cake, I made a few choices and served them as sort of a buffet. I made blackberry coulis and whipped cream with strawberries.

Whip cream is easy enough - heavy whipping cream in your mixer, whip until peaks start to form and slowly add powdered sugar to taste.


Blackberry coulis - in a food processor puree a pint of blackberries with 3 to 4 tablespoons of granulated sugar (again, to taste), then strain to remove any chunks or seeds. This can be done with just about any berry.

Thursday, October 8, 2009

The Perfect Cake


I had a really rough day yesterday. Just too many things went wrong - you know how those days are, right? So when i got home i thought to myself: "how can i salvage my day?". The solution: Put on some sweatpants, drink a glass of wine, and make a cake. Sometimes, sweets and sweats are the only thing that can make you feel better. The conclusion? Day was saved. And, SmittenKitchen really has found the perfect cake. It's just the icing I'm not completely sure about. But, if you don't mind things like sour cream, you might love the icing, plus, it really was the easiest icing i've ever made.

The truly PERFECT white cake:
It's light, fluffy, sweet, and divine in every sense of the word. This makes two 9" round cakes.

4 cups plus 2 tablespoons cake flour (not self-rising)
2 teaspoons baking powder
1 1/2 teaspoons baking soda
1 teaspoon salt
2 sticks (1 cup) unsalted butter, softened
2 cups sugar
2 teaspoons pure vanilla extract
4 large eggs, at room temperature
2 cups buttermilk, well-shaken

Firstly, if you're like me, you might be the kind of person who doesn't always read the ingredients before you start making the cake. So, when i started this cake, i realized I didn't have any buttermilk, which, despite what my husband says, can be easily made. Just use 2 cups of milk and 2 tablespoons of lemon juice. According to Joy the Baker (www.joythebaker.com) you just need to top the lemon juice with with skim, low fat or whole milk. Stir and let sit for two minutes. After two minutes, your milk is both acidic and curdled. So there you go.


Now on to the cake, preheat oven to 350°F. Butter two 9-inch round cake pans and line with circles of parchment paper, then butter parchment. (I used a cooking spray the buttered the parchment paper). One tip for this is to spray your pan very well, then just cut the parchment in a circle to line the bottom of the pan, that way your cake doesn't come out all wrinkled.

Sift together flour, baking powder, baking soda, and salt in a medium bowl. In a large mixing bowl, beat butter and sugar in a large bowl with an electric mixer at medium speed until pale and fluffy, then beat in vanilla. Add eggs 1 at a time, beating well and scraping down the bowl after each addition. Again... don't beat in your fork. It is NOT a good idea to try to get the flour off the top of the paddle attachment while it is mixing... At low speed, beat in buttermilk until just combined (mixture will look curdled). Add flour mixture in three batches, mixing until each addition is just Incorporated. I made a really big mess (as usual).


(this is a picture of my cool bowl scraping attachment)


Spread batter evenly in cake pan, then rap pan on counter several times to eliminate air bubbles. (I, like smittenkitchen, enjoy dropping my pan on the counter from a couple inches up and making a lot of noise - i especially like doing this while i'm on the phone so i can be as disruptive as possible) Bake until golden and a wooden pick inserted in center of cake comes out clean, 35 to 40 minutes. Cool in pan on a rack 10 minutes, then run a knife around edge of pan. Invert onto rack and discard parchment, then cool completely, about 1 hour.

The frosting is SO easy, but it tastes a little sour-cream-y to me. So i guess it depends on if you like sour cream or not.

This recipe makes 5 cups of frosting (more than enough to frost and fill a two layer 9-inch cake).

15 ounces semisweet or bittersweet chocolate, chopped
1 1/4 teaspoons instant espresso (optional, but can be used to pick up the flavor of average chocolate - definitely good)
2 1/4 cups sour cream, at room temperature
1/4 to 1/2 cup light corn syrup
3/4 teaspoon vanilla extract

Note: if your sour cream isn't at room temperature the chocolate will seize up when you add it.

Combine the chocolate and espresso powder in the top of a double-boiler or in a heatproof bowl over simmering water. If you don't have a double-boiler you can always make do with a big pot and a slightly smaller pot on top, just make sure the top one doesn't fall off. Stir until the chocolate is melted. (Alternately, you can melt the chocolate in a microwave for 30 seconds, stirring well, and then heating in 15 second increments, stirring between each, until the chocolate is melted.) Remove from heat and let chocolate cool until tepid.


(see the cool new trick i learned on photoshop? thanks dad!)

Whisk together the sour cream, 1/4 cup of the corn syrup and vanilla extract until combined. Add the tepid chocolate slowly and stir quickly until the mixture is uniform. Taste for sweetness, and if needed, add additional corn syrup in one tablespoon increments until desired level of sweetness is achieved. I added about 2 tablespoons.


Let cool in the refrigerator until the frosting is a spreadable consistency. It took 20 or 30 minutes for me, and probably shouldn't take any longer than that. If the frosting becomes too thick or stiff, just leave it out until it softens again.


mmmm.... Day Saved

Wednesday, September 2, 2009

Buttermilk Cake an Buttercream Cookies

Actually, both of these recipes are a lot easier than pie, which I frequently find to be a little bit difficult (especially if you make your own crust). The first is raspberry buttermilk cake, which is incredibly delectable but only makes about 8 slices, so it's not great for a crowd. The second is Bavarian Buttercream Cookies. One of the things that makes these cookies so wonderful is that the recipe calls for nothing other than ingredients you most likely already have in your pantry, making them the perfect cookies for spur-of-the-moment baking when you just don't feel up to the grocery store.

I would also like to take a moment to point out to all (three?) of my readers, that I am desperately in need of a job, so if you know of one... point me in the direction! Otherwise it is possible that I will be blogging from the public library and living out of a box on the corner within mere months. My blog will have to change titles of course, it will no longer be the Honey-Do Kitchen blog, instead I think I'll call it the I Live in a Box Blog, or perhaps to be more creative... the What You Can Cook Over a Steam Grate on the Street Blog. I anticipate that such a blog will have a much more limited recipe collection.

Now, back to the raspberry buttermilk cake. This could really be made with any berry you wanted. I've also made it with blackberries. The recipe (from smittenkitchen of course) is as follows:

Preheat the oven to 400 with the rack in the middle and butter and flour a 9" round cake pan.

You'll need:
1 cup all-purpose flour
1/2 teaspoon baking powder
1/2 teaspoon baking soda
1/4 teaspoon salt
1/2 stick unsalted butter, softened
2/3 cup plus 1 1/2 tablespoons sugar, divided
1/2 teaspoon pure vanilla extract
1/2 teaspoon finely grated lemon zest
1 large egg
1/2 cup well-shaken buttermilk*
1 cup fresh raspberries (or other berries)

*You can make your own buttermilk, my Mother says to use 1 tablespoon vinegar to 1 cup of milk, let stand until it looks curdled (maybe 8 to 10 minutes). I will point out however, that some people think that this kind of buttermilk isn't as good *coughJustincough*


Start (as usual) by whisking together flour, baking powder, baking soda, and salt, and setting this aside. Then in a larger bowl beat the butter and 2/3 cup sugar with an electric mixer at medium-high speed until pale and fluffy, for about 2 minutes, then beat in the vanilla and lemon zest. Add the egg and beat well.

At a low speed mix in the flour mixture in three batches, alternating with the buttermilk. Begin and end with the flour and mix until just combined. Spoon the batter into the cake pan and smooth the top. Then, scatter raspberries evenly over top and sprinkle with remaining 1 1/2 tablespoons sugar.


Now, I think i've already given you all my opinion about scattering things. As you can see, I chose to place my raspberries in concentric circles (is this the right term?). It looked much prettier and far more orderly, plus that way no piece of cake got shorted on fruit.

Bake until the cake is golden and a tooth-pick inserted into the center comes out clean, about 20 to 25 minutes. Cool in the pan for 10 minutes then turn out onto a rack to cool.


Next for the cookies. I got this recipe off of cooks.com after watching Stranger than Fiction. I am absolutely in love with Maggie Gyllenhaal's character in that movie. Sometimes when I'm baking I like to pretend that I'm really hot and have lots of cool tattoos. Anyway, at the end of the movie she mentions some sort of Bavarian cookie, which I honestly can't remember the name of anymore. But these were the closest thing I could find, and they are so yummy.

Like I said before, you'll probably already have everything you need for these cookies.

2 cups flour
1 tsp baking soda
1 tsp cream of tartar
1 1/2 cup sugar
1 cup butter, softened
3 egg yolks
1 tsp vanilla


Preheat the oven to 350.

Whisk together flour, baking soda, and cream of tartar. (Notice, in almost all recipes you will mix together the dry ingredients, then the wet ingredients, then add the dry to the wet. There is some sort of scientific chemical reason for this, but I don't know it) Set aside the dry ingredients.

At medium speed beat sugar and butter until blended, then crank it up to high speed till it's light and fluffy. In yet another bowl beat the egg yolks until thick and pale yellow.


Add the egg yolks and vanilla to the butter and sugar, then stir in the flour mixture until well blended. Shape the dough into 1" balls (or thereabouts) and place on an ungreased cookie sheet. Bake 12-15 minutes.


Next up: Lime Tart! (i think).

Thursday, August 27, 2009

This S**t is Bananas, B-A-N-A-N-A-S

You might think that being unemployed would give me more time to bake. On the one hand, you're right - it does. On the other hand, my husband says i'm making him fat and spending too much money on groceries. So, if you're wondering why I only post about once a week, that's why. Here's the thing. I could start making more, but only if people want to eat what i make. Therefore (thence? thus?), I'll make you an offer: I will share my confections with those who are willing to come pick them up from me, because lets face it, i shouldn't have to do all the work AND deliver! It won't solve the grocery bill problem, but at least I won't be making my husband fat.


This Banana cake completely makes up for my semi-failure with the yellow cake. It was awesome, though not soul saving. And what made it even better, was the delightful almond butter cream icing. mmmmm.


For the Banana Cake (from the complete Baking cookbook):

Preheat the Oven to 325 and spray two 9" round pans with nonstick spray.

you'll need:
3 cups cake flour
1 tsp baking soda
1/2 tsp salt
1/2 tsp baking powder
1 cup unsalted butter, softened
2 cups granulated sugar
3 eggs
1 1/2 cups mashed ripe bananas (about 4 large ones)
6 tbsp buttermilk (you can make this by mixing vinegar with regular milk - look online to find the proportions, i can't remember)
2 tsp vanilla extract
1/2 cup chopped pecans (it says so in the book, but i didn't have any, so i left them out)

Of course, I didn't have any butter milk (well actually, i did but it was like 2 weeks past its expiration date, so that doesn't count), so of course I had to call Justin to go to the store for me on his way home. This is why the first requirement for any place I live is that it be really, really, really near a grocery store. I NEVER remember to make sure i have all my ingredients before I start.

Start by whisking together the flour, baking soda, salt, and baking powder. Don't confuse the baking soda and baking powder measurements, i've done this before and it never ends well.

In a mixer bowl fitted with a paddle attachment, beat the butter and sugar till creamy. Then beat in the eggs, one at a time, beating well after each addition. Next add the bananas, buttermilk and vanilla and mix until blended. I was worried because it looked a little curdled, but i guess it's supposed to look like that, because it turned out great!


Using a wooden spoon gradually stir flour mixture just until incorporated and fold in pecans. Okay - why always a wooden spoon? I don't think it makes a difference... Can anyone explain to me how a WOODEN spoon is different from a plastic spatula? Does the wood make the cake taste better?


Divide batter evenly between prepared pans and bake until a toothpick inserted into the center comes out clean. About 40 to 50 minutes. Let cool in pans on a wire rack for 10 minutes before transferring to rack to cool completely.

Icing next:

all you need is
1/2 cup unsalted butter, softened, cut into cubes
3 1/2 cups confectioner's sugar
1/4 cup milk, preferably whole
2 tsp almond extract.

Like when making the cake, I neglected to make sure I had all my ingredients before starting to make the icing. Turns out I didn't have any whole milk, only skim. So, I asked my dear husband, and he said I could mix the skim milk with just a little heavy cream, which I did have. So, if you have heavy cream by some odd circumstance, you can mix it with your skim milk and it works.

Also, the recipe for the icing says to use a food processor, which I have but for which I have no room. I used my mixer.

Mix/process butter until smooth, about 30 seconds (probably more in a mixer), scrape down the bowl and add confectioners sugar. Mix/process until it just begins to gather then with motor/blade running, drizzle milk and almond extract in and mix or process until smooth. I made a really big mess doing this.


I thought the icing recipe made a little less than I would've liked since I used it as a layer between my two cakes and on the top, but I made it work. However, I suggest that if you plan on serving this as a birthday cake or something, you make at least 1 1/2 times the recipe just to have plenty for decorating.


yummy!

As Julia Child would say (and Julie from the movie Julie & Julia) - Bon Apitiet! (How do i spell that?)

Wednesday, August 19, 2009

Comfort Cake

Tonight I am going to start with a word to the wise: when feeling slightly inadequate, a little bit hard to please, and in the mood for something that resembles comfort food, don't turn to the Harrods Book of Cakes & Desserts (circa 1986). This book will not make you feel better about your cooking abilities. Everything inside is insanely complicated and most of the recipes use words i don't know.

Instead, try turning to one of your favorite cookbooks, something trusty, easy. That's why tonight I went with "the Complete Baking Cookbook." Just yellow cake with chocolate frosting - it sounded good. I didn't have time to make the icing, so i'll post that tomorrow. Anyway, it says in the book that for best results you should freeze the cake for one to two days before icing, so really I'm just being a good decorator.

So here's how it goes:

Preheat the oven to 350 and spray 2 9" round cake pans with nonstick spray.

Ingredients:
3 1/2 cups cake flour
4 tsp baking powder
1/2 tsp salt
1 cup cold water
1 tbs vanilla extract
1 1/2 cup unsalted butter, softened
2 cups granulated sugar
5 eggs

Now, I know it seems like 1 1/2 cups of butter is a lot. But, that's why it tastes so damn good. Butter makes EVERYTHING better. I think i could write entire sonnets, odes, lyrical poems even, to butter. And, it's a verifiable fact that I've always loved butter. When i was a kid i actually liked to eat butter straight off the stick, now i just like butter in everything I eat. Okay, now that I've finished professing my love of all things butter - I'll get to the instructions.

Start by whisking together flour, baking powder and salt in one bowl. In a second small bowl, stir together water and vanilla. Set aside.

In mixing bowl cream butter and sugar until light and fluffy (about 2 minutes). Add eggs, one at a time, eating well between each addition. Here's my suggestion about this. Break the eggs (one at a time) into a separate bowl before adding into the butter/sugar mixture. That way if you're like me and you get a little egg-shell in the way you can just pick it out, instead of throwing out all that delicious butter and sugar.


Next using a wooden spoon (i don't have one at my apartment so i used a plastic spatula) stir in the flour mixture, alternating with the water mixture, making three additions of flour and two of water, until just blended.

Divide the batter equally between prepared pans. Bake until light brown and a toothpick inserted into center comes out clean, about 28 to 36 minutes. Let cool in pans on a wire rack for 10 minutes before transferring to rack to cool completely.


(Yes, i realize my oven is a little gross on the bottom - please feel free to come over and clean it for me)


This last instruction may have been my problem. Justin took the cakes out for me and decided very sweetly to go ahead and turn them out onto the wire rack for me. Unfortunately he did this almost immediately, and proceeded to brake one of my cakes right in half. I'll recognize the gesture though and i'll glue it back together with icing tomorrow. Anyway, as i said earlier, the cookbook says that for best decorating results you should wrap the cakes in plastic wrap and freeze for 1 to 2 days. Icing recipe and completed product coming tomorrow!

Sunday, August 16, 2009

Soul-Saving Almond Cake

Finally, I'm back! Back from the beach, back from a wedding in Houston, basically just back. I know I've been negligent but you'll just have to forgive me. However, I haven't been a total failure. As promised on facebook, I made an almond cake. And this isn't just any almond cake, it's a soul saving almond cake. You may have in the past asked, can music save your mortal soul? No. This cake can - it says so on www.amateurgourmet.com

Now, i understand that the pictures of this cake don't do it justice (at all) but just trust me on this one. It's pretty damn good. It's moist, a little crumbly, and gets better over time.


Ingredients:
2 sticks butter, softened, more for buttering pan
1 cup sour cream, at room temperature
1 tsp baking soda
2 cups sifted all-purpose flour (measured after sifting)
1/2 teaspoon sea salt
1 1/2 cups sugar
7-oz tube almond paste, cut into small pieces
4 egg yolks, at room temperature
1 tsp almond extract
Confectioners' sugar, for sifting over cake

Making the Cake:
Preheat the oven to 350 degrees F and butter sides and bottoms of one 9-inch springform pan generously. Mix together the sour cream and baking soda in a small bowl. Sift the flour and salt into another bowl. The website i got this recipe from said to sift the flour first, before measuring. I've never done this, which could be why my cake always falls in on itself, but that doesn't change the taste, believe me.

In the bowl of an electric mixer fitted with a paddle, cream the butter and sugar until fluffy. Add the almond paste, a little at a time, at medium speed, and beat for 8 minutes or so.

Beat in the egg yolks one at a time, and mix until incorporated. (I'll let you know when i find something good to do with egg whites, other than meringues which i don't like much). It will look curdled but don't worry. Blend in the almond extract and sour cream mixture. Reduce mixer speed to low and gradually add the flour mixture, just until blended. Then pour the batter into the prepared pan and spread evenly.


Okay, i realize this isn't my best photography, but it's just supposed to be illustrative of cut up almond paste, egg yolks all nice and separated, and butter which i actually remembered to take out of the fridge to soften instead of trying to microwave it.

Bake about 1 hour. It is done when you press the top and it returns to its shape, and also shrinks from the sides of the pan. Okay, actually i never had the experience of having it return to its shape, but that's what amaturegormet says, so i'll trust it. Remove from the oven and place on a baking rack to cool in the pan. When ready to serve, sift confectioners' sugar on top and slice like a pie. And actually, Justin and I both think it's just as good, maybe better, without the powdered sugar on top, so that's your call.

Ta-Da:


Really, try this cake. Also, you can leave comments on this blog (just so you know - i've had a lot of comments on facebook and i won't be posting blog updates there for too much longer i think). Also, this means you should bookmark me so you can comeback and visit!

Wednesday, August 5, 2009

Beach Food

This weekend Justin and I are taking our first vacation as a married couple (other than the honeymoon). We're going on a family vacation to Port Aransas! And, I'm not gonna lie, I'm stoked about the beach. I even ordered a new, ridiculously over priced, awesomely vintage (well, vintage style that is), swimsuit. Of course, i ordered the swimsuit online and haven't gotten it yet, but hopefully it will arrive before we leave, probably just in time for me to be tremendously disappointed that it doesn't look as fabulous on me as it did on the model online.

So the point of all this is that tonight I was on a mission. I baked 2 pies, made a double recipe of oatmeal chocolate chip cookies, and made an amazing cake called "blueberry boy bait." Granted, I still have plenty to do, like pack, and make something breakfast-y. It's likely I'll be freaking out tomorrow half an hour before we're supposed to leave with only half my stuff done and my entire suitcase left to pack. I didn't actually pack for the honeymoon until the day of my wedding (we were supposed to leave straight from the reception hall that night). In other words - I'm probably screwed even after all my baking tonight.

Key Lime Pie was first because it has to chill, the longer the better. This is a recipe my friend Jennifer gave me and my favorite thing about it is that it's cooked. As my husband will tell you, I have an unreasonable paranoia about raw eggs. Really, terror is a better word. I haven't eaten raw cookie batter since I was about 3 years old (you know, before they knew what salmonella was). I can't help it, that's just how I was raised. I've tried buying the pasteurized eggs, but it doesn't assuage my fear. So - no raw eggs.

Key Lime Pie
1 small Graham cracker crust (i use the pre-made ones, it's just easier in these beach kinds of situations)
3 egg yolks
1 tsp key lime zest
2/3 cup key lime juice
1 can sweetened condensed milk

Start by mixing the egg yolks and zest for about 3 to 5 minutes until yolks are thick and pale yellow. Something like this:


Slowly add the sweetened condensed milk, with mixer on low speed add in lime juice (also slowly). pour in the pie crust and cook 10 to 12 minutes at 350
cool at room temperature then refrigerate 3 to 4 hours before eating. if you absolutely must, you can freeze the pie for a slightly shorter wait period between cooking and eating. Whip cream is optional, but delicious.


Blueberry Boy Bait was my next project, recipe courtesy of www.smittenkitchen.com

cake:
2 cups plus 1 teaspoon all-purpose flour
1 tablespoon baking powder
1 teaspoon table salt
2 sticks unsalted butter, softened
3/4 cup packed light brown sugar
1/2 cup granulated sugar
3 large eggs
1 cup whole milk
1/2 cup blueberries, fresh or frozen (if frozen, do not defrost first)

Topping
1/2 cup blueberries, fresh or frozen (do not defrost)
1/4 cup granulated sugar
1/2 teaspoon ground cinnamon

start by preheating the oven to 350 degrees and greasing and flouring a 13 by 9-inch baking pan.

Whisk, or in my case, mix with a fork, two cups flour, baking powder, and salt. With electric mixer, beat butter and sugars on medium-high speed until fluffy, about two minutes. Add eggs, one at a time, beating until just incorporated and scraping down bowl. Reduce speed to medium and beat in one-third of flour mixture until incorporated; beat in half of milk. Beat in half of remaining flour mixture, then remaining milk, and finally remaining flour mixture. Toss blueberries with remaining one teaspoon flour. Using rubber spatula, gently fold in blueberries. Spread batter into prepared pan.


try not to drop your spoon in to the bowl while you're mixing.


Next scatter blueberries over top of batter. Or, if you're anything like me, you can methodically place the blueberries over top of batter. Stir sugar and cinnamon together and sprinkle over batter.


Bake until toothpick inserted in center of cake comes out clean, 45 to 50 minutes. Cool in pan 20 minutes, then turn out and place on serving platter (topping side up).


Chocolate Chip Oatmeal cookie recipe coming tomorrow!