Tuesday, December 15, 2009

Gingerbread Apple Upside-down Cake and Cinnamon Buns

Another new post in the same week you ask? My Answer? YES. And in fact, this is a post so delicious and so very wintery, that you need to get ready. Prepare yourself. Get out your hot apple cider, hot chocolate, start a fire in the fireplace (or if you don't have a fireplace, at least light this candle), and put on some comfy house slippers. Today we've got gingerbread apple upside-down cake and cinnamon buns. mmm, spicy and sweet and perfect for cold weather.

Gingerbread Apple Upside-down Cake - adapted from SmittenKitchen
Ingredients:
Topping
4 tablespoons butter, plus extra for greasing pan
1/2 cup dark brown sugar
Pinch of salt
4 apples (about 1 3/4 pounds), peeled, cored and cut into 1/4-inch wedges

Batter
1/2 cup (1 stick or 4 ounces) butter, at room temperature
1/2 cup sugar
1 large egg
1/3 cup dark molasses
1/3 cup honey
1 cup buttermilk
2 1/4 cups flour
1 teaspoon baking soda
1/2 teaspoon salt
1 teaspoon ground ginger
1 teaspoon cinnamon
Very softly whipped cream

Instructions:
Start with the topping
1. Preheat the oven to 325°F. Grease a 10-inch cake pan. Melt butter in a small saucepan.

2. Add brown sugar and simmer over moderate heat, stirring, four minutes, then swirl in salt. Remove from heat and pour into the bottom of your cake pan.

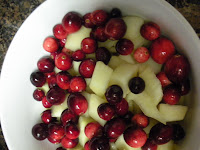
3. Make circles of overlapping apple slices on top of the caramel. Chop any remaining slices and place them in the gaps.

For the batter:
1. Using a mixer, blend 1/2 cup butter and the sugar on medium-low speed. Increase the speed to high and cream until light and fluffy.

2. In a medium bowl, whisk together the egg, molasses, honey and buttermilk. In a separate bowl, sift together the flour, baking soda, salt, ginger and cinnamon. Alternate mixing the flour and molasses mixtures into the butter mixture, adding the next once the last has been incorporated.


3. Pour the batter into the pan. Bake at least 45 to 50 minutes or until a wooden pick inserted into the center of the cake comes out clean. Let cool on a rack for 10 to 15 minutes, then turn out onto a platter and enjoy!


(Yes, I realize it's not the most beautiful photography, but that didn't stop us destroying half of this cake in one night).

For the Cinnamon Buns (careful - they're addicting) - about 18 buns, also from SmittenKitchen

For the Dough you'll need:
1 cup whole milk
3 tablespoons unsalted butter
3 1/2 cups (or more) unbleached all purpose flour, divided
1/2 cup sugar
1 large egg
2 1/4 teaspoons rapid-rise or instant yeast (from 1 envelope yeast)
1 teaspoon salt
Nonstick vegetable oil spray

And for the Filling:
3/4 cup (packed) golden brown sugar
2 tablespoons ground cinnamon
1/4 cup (1/2 stick) unsalted butter, at room temperature
Pinch of salt
Optional: Pecans and Raisins (quantity as desired) 

Glaze:
4 ounces cream cheese, at room temperature
1 cup powdered sugar
1/4 cup (1/2 stick) unsalted butter, room temperature
1/2 teaspoon vanilla extract

Instructions for the Dough:
1. Combine milk and butter in glass measuring cup. Microwave on high until butter melts and mixture is just warmed to 120°F to 130°F, about 30 to 45 seconds. Pour into bowl of stand mixer fitted with paddle attachment.

2. Add 1 cup flour, sugar, egg, yeast, and salt. Beat on low speed 3 minutes, stopping occasionally to scrape down sides of bowl. Add additional 2 1/2 cups flour. Beat on low until flour is absorbed and dough is sticky, scraping down sides of bowl. If dough is very sticky, add more flour by tablespoonfuls until dough begins to form ball and pulls away from sides of bowl.

3. Turn dough out onto lightly floured work surface and knead until smooth and elastic, adding more flour if sticky, about 8 minutes. (I used a KitchenAid dough hook instead) Form into ball.

4.  Lightly oil large bowl with nonstick spray. Transfer dough to bowl, turning to coat. Cover bowl with plastic wrap, then kitchen towel. Let dough rise in warm draft-free area until doubled in volume, about 2 hours.

Instructions filling/making the buns:
1. Mix brown sugar, cinnamon and pinch of salt in medium bowl.

2. Press down dough. Transfer to floured work surface. Roll out to 15×11-inch rectangle. Spread butter over dough, leaving 1/2-inch border. Sprinkle cinnamon mixture evenly over butter. Sprinkle on pecans and raisins as/if desired.

3. Starting at the longer side, roll dough into log, pinching gently to keep it rolled up. With seam side down, trim ends straight if they are uneven and cut remaining dough crosswise with thin sharp knife (i used my bread knife) into 18 equal slices (each about 1/2 to 3/4 inch wide). We baked the end pieces in a tiny loaf pan so as not to waste them.


4. Spray two 9-inch glass baking dishes (rectangle or square is fine, an 8-inch square metal pan worked just fine, too) with nonstick spray. Divide rolls between baking dishes, arranging cut side up (there will be almost no space between rolls). Cover baking dishes with plastic wrap, then kitchen towel. Let dough rise in warm draft-free area until almost doubled in volume, 40 to 45 minutes. Don't skip on this like I did, your rolls just won't come out as pretty, though they will taste just as good.


5. Position rack in center of oven and preheat to 375°F. Bake rolls until tops are golden, about 20 minutes. Remove from oven and invert immediately onto rack. Cool 10 minutes. Turn rolls right side up.


Finally, Glaze the rolls: Combine cream cheese, powdered sugar, butter, and vanilla in medium bowl. Using electric mixer, beat until smooth. Spread glaze on rolls. Serve warm or at room temperature.


SmittenKitchen says "These buns were best the day they were baked. The second day, they were on the tough side. If you anticipate wanting them over a few days, glaze them to order, heating the buns beforehand to soften them up" - but you know what? Justin and I ate them for like 3 days - cold and preglazed and all.

Saturday, December 12, 2009

Brownies, Cheesecake, and Peanutbutter Cookies

That's just the short title. This post is really about Brownies with Peppermint Frosting, Caramel Chocolate Cheesecake, and Chocolate Dipped Peanutbutter Sandwich Cookies. And not only that, but these awesomely, monstrously, deliciously, huge peanbutbutter sandwich cookies are going to be my entry into the Gourmet Girl Magazine's Virtual Holiday Cookie Crawl. This is your opportunity to show me you love me! On December 22nd Gourmet Girl Magazine will post a ballot and you can vote on your favorite cookies - obviously mine...


Now tell me those cookies don't look good to you.

But, there are other things going on in the world than making cookies. Namely, other holiday things. And given that this is our first holiday season as a married couple, Justin and I decided that we had to get a REAL and seriously awesome fresh Christmas Tree. Firstly, I just don't believe in fake trees. They don't smell good, they don't make your entire house just glow with all the magic of Christmas, and frankly, they're just a little lackluster. Now, I know lots of people swear by fake trees - allergies and all that. Know what I did this morning? Took allergy medication, it is SO worth it. So now that i've gotten my little rant out of the way, I'm going to share our very first christmas tree with you. Don't you feel special?


The picture is a little fuzzy, my camera just isn't up to the task of taking decent pictures in low lighting. And a picture really can't capture the essence of this tree. We found the perfect tree. It's full, and it's a grand fur, which means it smells all citrusy and fresh and crisp. I wish I had a scratch and sniff photo for you. But back to the point.

The Chocolate Dipped Peanutbutter Sandwich Cookies, slightly adapted from a Joy the Baker recipe, are reasonably easy to make, and really scrumptious. yeah. i said scrumptious. I ended up with about 20 fairly large sandwich cookies.

Ingredients:

For the Cookies:
1/2 cup unsalted butter, at room temperature
3/4 cup smooth peanut butter
1/2 cup granulated sugar
1/2 cup firmly packed brown sugar
1 egg
1 1/2 cups flour
1/2 teaspoon baking powder
3/4 teaspoon baking soda
1/4 teaspoon kosher salt

For the Filling:
2 cups crunchy peanut butter
1/2 cup unsalted butter, at room temperature
1/4 cup heavy whipping cream
1/2 cup powdered sugar
1/4 cup firmly packed brown sugar
1 teaspoon vanilla extract
1/4 teaspoon kosher salt

For the Optional Coating:
10 ounces semisweet chocolate chips
1 cup peanuts, coarsely chopped (Joy the Baker recommends honey roasted, I used regular)

1. Preheat your oven to 375 degrees F and line baking sheets with parchment paper, or do what I did and use a nonstick pan. If you lined with parchment paper make sure you grease with butter or cooking spray.

2. Using a stand mixer with a paddle attachment, beat the butter and peanut butter on medium speed until well combined.  Add the sugars and beat until light and fluffy, usually about 2 minutes. Then add the egg and beat on medium speed for another minute. 

3. In a medium bowl, whisk together the dry ingredients (flour, baking powder, baking soda and salt). Add the flour mixture to the peanut butter mixture and beat on low until just combined.  Refrigerate the dough for at least 30 minutes.  (I got impatient and refrigerated for a slightly shorter time, they still turned out fine)

4. Drop the dough by the scant tablespoon full onto a cookie sheet about 1 1/2-inches apart.  Use a fork to press the cookies flat.  Bake for 7-10 minutes until the cookies are a deep golden brown along the edges.


To make the filling:
1. Wash your stand mixer bowl and paddle attachment then using your mixer, beat the butter, peanut butter and heavy cream together on medium speed until light and fluffy, about 2 minutes.

2. Add the powdered sugar, brown sugar, vanilla, salt and beat on medium speed until combined.  Try not to eat it all before spreading on cookies.

To make the coating:

1. Melt the chocolate chips in the microwave, or over a double boiler.  I prefer a double boiler because it keeps the chocolate soft and melted while you're dipping.

To assemble the cookies:  Use a spatula or small knife to spread the filling onto the flat bottom of a cookie.  Top with another cookie, ridge side up.  Set a wire rack on top of a sheet of waxed paper to catch the chocolate drips if you decide to dip your cookies in chocolate. If you're out of was paper get creative and use your cookie sheet as a chocolate drip catcher.  Then, just dip the chocolate dipped end of the cookie in a bowl of the crushed peanuts. Let the cookies stand for 1 hour to harden, refrigerate for a few minutes.


The cookies last up to 3 days in an airtight container, or 2 weeks in a container in the fridge

That's not all. This update is just jam packed with awesomeness.  Next up: Caramel Chocolate Cheesecake from Smitten Kitchen.

Caramel Chocolate Cheesecake:

Ingredients:
Crumb Crust*
1 1/2 cups (5 ounces) finely ground cookies such as chocolate wafers
5 tablespoons unsalted butter, melted
1/3 cup sugar
1/8 teaspoon salt

Cheesecake:
1 crumb crust (above)
1 cup sugar
3/4 cup heavy cream
8 oz fine-quality bittersweet chocolate (not unsweetened), chopped
1/2 cup sour cream
3 (8 ounce) packages cream cheese, softened
4 large eggs
1 teaspoon vanilla


Instructions:
1. Preheat oven to 350 degrees and butter a 24-centimeter springform pan. 

2. Stir together crust ingredients (cookie crumbles, butter, sugar, and salt) and press onto bottom and 1 inch up side of a buttered 24-centimeter springform pan. Chill up to 2 hours if not filling immediately.

3. Cook sugar in a dry heavy saucepan over moderately low heat, stirring slowly with a fork, until melted and pale golden. Cook caramel without stirring, swirling pan, until deep golden. Remove from heat and carefully add heavy cream (mixture will vigorously steam and caramel will harden). Cook over moderately low heat, stirring, until caramel is dissolved. Remove from heat and whisk in chocolate until smooth. Stir in sour cream.


 4. Beat cream cheese with an electric mixer until fluffy, then beat in chocolate mixture on low speed.

5. Beat in eggs, 1 at a time, then vanilla, beating on low speed until each ingredient is incorporated and scraping down bowl between additions.

6. Place your springform pan with crust in a shallow baking pan. Pour filling into crust and bake in the baking pan (to catch drips) in middle of oven 55 minutes, or until cake is set 3 inches from edge but center is still slightly wobbly when pan is gently shaken. **

7.  Run a knife around top edge of cake to loosen and cool completely in springform pan on a rack. (Don't worry, the cheesecake will continue to set as it cools.) Chill cake, loosely covered, at least 6 hours. Remove side of pan and transfer cake to a plate. Bring to room temperature before serving.

*Next time I make this I will definitely double the crust. 

** If you are worried about the cheesecake cracking there are 2 different options. Firstly, place a pan of water on the lower rack in your oven underneath the cheesecake. And, secondly, open your oven slowly, maybe an inch at a time, when removing cheesecake to cool the cake more slowly. 


And finally, Brownies with Peppermint Frosting. Brownies from my Cave: A Passion for Chocolate Cookbook (makes about 16 brownies), and the frosting from a new cooking blog i've recently stumbled across - Vanilla Kitchen.

Ingredients:
1/2 cup unsalted butter
2/3 cup chopped dark chocolate
1 cup superfine sugar
2 large eggs
1 tsp vanilla extract
3/4 cup all-purpose flour, sifted.
3/4 cup chopped walnuts.

Instructions:
1.  Preheat the oven to 350. Butter a shallow 7" square brownie pan and line with parchment paper (if you have any parchment paper, otherwise just spray the pan with nonstick spray).

2. Melt the butter in a medium saucepan over low heat and add in the chopped chocolate, stirring until smooth. Allow to cool.

3. Using an electric mixer or a stand mixer fitted with paddle attachment, beat the sugar and eggs together, then stir in the cooled chocolate mixture along with the vanilla extract. Using a rubber spatula, fold in the sifted flour, then stir in chopped walnuts.


4. Pour the batter into the prepared pan and bake for 30 to 35 minutes, checking 2 or 3 minutes before the end of the time. The top should be firm. Depending on how you like your brownies you can take them out earlier or later. Allow the brownies to cool in the pan.

Peppermint Icing:

1 stick unsalted butter (8 tablespoons), softened
2 cups confectioners’ sugar
1-2 tablespoons milk
1 teaspoon mint-flavored extract
Crushed peppermint pieces (optional) 

In the bowl of a standing mixer or with a handheld mixer, beat butter and confectioners’ sugar at low speed until just incorporated, then increase the speed to medium and beat until smooth and fluffy, about 1 1/2 minutes. Add 1 tablespoon of milk and the mint extract and continue to beat until combined, about 30 seconds. If needed add up to 1 additional tablespoon milk to achieve a soft spreadable consistency (this wasn't necessary for me).

To assemble: Using an offset spatula, spread the mint frosting evenly onto the cooled brownies. If desired, sprinkle with crushed peppermint pieces. For best results cover the brownies and allow the icing to set in the refrigerator for about an hour.


Sunday, December 6, 2009

Thanksgiving Foods

Thanksgiving was Justin's and my first holiday together as an official married couple, and it presented unheard of challenges. In the end we settled on having Thanksgiving afternoon at Justin's MawMaw's house and the day after thanksgiving at my parent's. This solution was not without it's faults, but it was the best we could come up with. There was also the challenge of splitting up who was making what, and in the end we settled on being in charge of all desserts. However, in spite of all the challenges and general ridiculousness - Thanksgiving was officially awesome. We had fun, we watched the game (hook em!), we ate way too much food.

As far as the desserts we made - Okay, I know its a little late. Actually, it's a lot late. But, better late than never right? Maybe you can make these for thanksgiving next year. Or for Christmas this year. Or just because. Cause you know what? They were goooood.

I found this Pear Cranberry Cake in my issue of 'Gourmet Magazine' - it's easy, delicious, and beautiful. Jewel-bright cranberries and moist pear give it color, sweetness, and festivity.


Ingredients (for cake)
3 cups all purpose flour
1 tbsp baking powder
1 tsp salt
1 spt cinnamon
1/2 tsp ground allspice
1/2 tsp grated nutmeg
1 3/4 cups sugar
1 1/4 cups vegetable oil
4 large eggs
1 tbsp vanilla extract
3 Bosc pears (you could use Bartlett too if you wanted), cut into 3/4 inch pieces
1 cup cranberries (thawed if frozen)

Ingredients (for glaze)
1 cup heavy cream
1/2 cup pakced light brown sugar
1 tsp light corn syrup
1 tsp vanilla extract
2 (3 inch long) cinnamon sticks.

Instructions:
1. Preheat the oven to 350F with rack in the middle and butter either an angel food cake pan or a 15 cup bundt pan. 

2.  Whisk together flour baking powder, salt, and spices.


3. Beat together sugar, oil, eggs, and vanilla with an electric mixer until combined well.

4. At a low speed mix in pears and cranberries, then mix in the flour mixture until incorporated. Spoon batter into your pan and bake until a wooden pick inserted into the center of the cake comes out clean - about 1 1/4 to 1 1/2 hours depending on your oven. Cool in pan for 30 minutes then turn out onto a rack to cool completely.

5. To make the glaze bring cream, brown sugar, corn syrup, vanilla, cinnamon sticks, and a pinch of salt to boil in a small heavy saucepan, stirring occasionally, then simmer until slightly thickened, about 10 minutes. You don't want to scald the cream, so start on low heat and raise gradually. Cool the glaze for about 5 minutes and discard the cinnamon sticks, then pour the glaze over the cake, letting some drip down the sides.

* Cake can be made 1 day ahead and kept at room temp, and glazed up to 3 hours in advance of serving.

The other desserts I made were (obviously) pies. My mom told me that I should just let her know what I was making, and she would buy frozen pies to supplement. No way. Why would you buy frozen pies when you have a daughter who enjoys, nay, loves, baking? So, I also made a German Chocolate Pecan Pie and a Pumpkin Pie - that way no one would have any reason to wish for frozen pies. 

German Chocolate Pecan Pie


 (sorry this is the only picture I got, and it's not very good - camera issues)

Ingredients:
1 premade roll out pie crust
2 large eggs
5 tbsp unsalted butter
1/2 cup dark brown sugar
1/2 cup light corn syrup
2 1/2 cups pecan halves, coarsely chopped
3/4 cup sweetened flake coconut
3/4 semisweet chocolate chips

Instructions:
1. Roll out premade pie crust and blind-bake according to instructions on box until crust is just lightly baked (you don't want it to brown much to prevent burning later).

2. Meanwhile, in a medium bowl, whisk the eggs. In a heavy, medium saucepan, whisk together the butter and 1/2 tsp salt with the brown sugar and corn syrup over medium heat until melted and smooth. Whisk the sugar mixture into the beaten eggs very slowly so as not to cook the eggs with the heat from the sugar mixture. Stir in the nuts and coconut.

3. Spread chocolate chips in the pie shell then pour filling over it. Bake until set, about 25 minutes. Allow the pie to cool completely before slicing.

Finally, I made Paula Deen's Pumpkin Pie, I'll let you follow the link for that recipe. It's a basic pumpkin pie, and really delicious. I also made Cinnamon Whipped Cream to go with it - definitely a big hit.


Friday, December 4, 2009

Apple Granola Crisp and Zesty Orange Madelines

So here's what's up guys. I know it's been a while since I posted, and I keep promising new posts and not delivering. Really, I'm sorry. Believe it or not, the last two weeks have been even crazier and more hectic than usual. But i've got an entire weekend of posts coming - i promise. One a day maybe! 

This apple granola crisp is an awesome Smitten Kitchen recipe. And given that i LOVE breakfast, and I am trying awfully hard to be a little bit healthy (as per the husband's request), I went for these instead of something like... I don't know... breakfast cake! Which believe me, if I can find breakfast cake, i'll probably make it. I have been known to eat cake for breakfast on more than one occasion. Anyway, back to the breakfast apple granola crisp - it's good, and really fabulously easy, and it makes a LOT. I feel like this would be something really good to make when you have out-of-towners - you can awe them with your bed-and-breakfast quality breakfast, without stressing out or having to get up early to slave away (just make it the night before).


Breakfast Apple Granola Crisp
Ingredients:

3 pounds of apples (any kind) peeled, cored and cut into medium chunks
2 tablespoons lemon juice
3 tablespoons sugar
2 tablespoons cornstarch
1 teaspoon cinnamon
Salt
1 stick (8 tablespoons or 4 ounces) unsalted butter
1/4 cup honey
1/2 cup flour
2 cups oats
1/2 cup sliced almonds
1/2 shredded coconut (sweetened or unsweetened, as you wish; I used unsweetened)


Instructions:
1. Preheat oven to 400°F. Mix apple chunks with lemon juice, sugar, cornstarch, cinnamon and just a pinch of salt in a 9×13-inch baking dish until apples are evenly coated. 


 2. In a medium saucepan, melt the butter and honey. Stir in the flour, oats, almonds, coconut and another pinch of salt until clumps form. Sprinkle this evenly over the apple mixture and bake in the oven for about 45 to 55 minutes, or until the apples are softened and bubbly. 

3. If the granola starts to get too brown, cover the baking dish with foil for all but the last few minutes of baking time. But, be sure to remove the foil again in the last couple minutes to help the granola stay crispy. Cool to room temperature and then refrigerate. Smitten Kitchen recommended eating with yogurt - definitely a worth while suggestion. Yum. 

One of the reasons my life has been so crazy is that I recently made a weekend trip up to Indiana. It turns out that Indiana is really beautiful, and that I've got some cool family history stuff goin' on there. But if you're anything like me, being on a plane means being hungry and grumpy with the gross food they try to serve you. I decided that in order to endure several hours on the plane I would need a really delicious snack - it was really good foresight. The plane food was in fact gross, I was hungry, and I was really glad I had made Madelines! I used Emril Legassi's Madeline recipe, and I have to say, they're pretty darn good. 


Zesty Orange Madelines
Ingredients:
4 large eggs
3/4 cup sugar
1/4 teaspoon pure vanilla extract
1/4 pound (1 stick) unsalted butter, melted and slightly cooled + extra non-melted butter for the pan
1 cup bleached all-purpose flour + extra for the pan
1 teaspoon baking powder
1 tablespoon orange zest, finely minced
1/4 pound semi-sweet chocolate, melted

Instructions:
1. Preheat the oven to 350 degrees F and Grease and flour 24 madeline molds (or 12 in my case, then wash and reuse) 


2. In a large mixing bowl, combine the eggs, sugar and vanilla. With an electric mixer set on high speed, cream the mixture until pale and fluffy, about 10 minutes. 


 3. In a small mixing bowl, combine the flour and baking powder. Add the zest and half of the flour mixture and beat on medium speed until incorporated. Add the remaining flour mixture and beat again until incorporated. Add the butter in a steady stream and continue beating until well blended. Let stand for 10 minutes. 

4. Spoon the batter into the molds so that they are two thirds full. Bake until lightly golden, 18 to 20 minutes. Remove from the oven and using a thin knife, pop them out of the pans onto a wire rack. The cookies can be served either warm or cooled and dipped in the chocolate. 

5. To dip in the chocolate, dip half of each cookie in the chocolate, letting the excess drip and place on parchment lined baking sheet. Allow the cookies sit until the chocolate sets. 


For the record, I LOVED the cookies dipped in chocolate. I really like the citrus and chocolate flavors together. However, quite a few people who had these said they would've preferred the cookies without the chocolate - it's up to you. 

Wednesday, November 25, 2009

Skillet Cornbread

It's Thanksgiving tomorrow, and so far I've spent my day cleaning, baking, and cleaning some more. I actually braved the grocery store yesterday, but I came back four pears short, so unfortunately I'm going to be headed back that way again today. Wish me luck. Yesterday I got stuck behind an incredibly confused young lady who spent at least 15 minutes staring at the spices in the baking isle, which was already so packed that there was no way around her. I wanted to offer help, but she looked so annoyed that I was too chicken to say anything. Anyway, most of the things I'm making for Thanksgiving unfortunately won't be posted till after Thanksgiving, however, this is one staple that EVERY good southern family needs during this holiday weekend. Skillet Cornbread. mmmmm, the crispy crusty outside, the sweet honey-crumbly goodness, the beautiful rich yellow color... I could go on forever.

This corn bread is one my grandmother used to make, my mom has made my entire childhood, and I started making the day I got my cast iron skillet. It's a trusty, good ol' Betty Crocker recipe.

Skillet Cornbread:

1 1/2 cups yellow, white, or blue cornmeal (i use yellow)
1/2 cup all-purpose flour
1 1/2 cups buttermilk*
1/4 cup shortening + extra for greasing skillet
2 teaspoons baking powder
1 teaspoon sugar
1 teaspoon salt
1/2 taspoon baking soda
2 large eggs
honey for drizzling

*if you don't have any buttermilk make your own using 1 1/2 cups milk + 4 tablespoons vinegar.

Start by heating the oven to 450. Use shortening to grease the bottom and sides of a 10-inch round cast iron skillet, then put in oven to heat.


Meanwhile, in a large bowl stir all ingredients until well mixed. Beat vigorously for 30 seconds, then pour into hot skillet.


Bake in skillet for about 20 minutes, or until golden brown and toothpick inserted into center comes out clean. Serve warm with butter and honey.


Tuesday, November 17, 2009

Gingerbread Men

It's just that time of year - time for apple cider, gingerbread, planning for thanksgiving, and wearing thick sweaters. Okay, I know I live in Texas so the thick sweaters aren't happening so much, but at all the rest is true.  And, in the spirit of fall and cool crisp weather, I decided it was time for gingerbread! This recipe comes from The Joy of Baking, and I was very happy with it. 


Gingerbread Men: 

3 cups (420 grams) all purpose flour
1/4 teaspoons salt
3/4 teaspoon baking soda
2 teaspoons ground ginger
1 teaspoon ground cinnamon
1/4 teaspoon ground nutmeg
1/4 teaspoon ground cloves
1/2 cup (113 grams) unsalted butter, room temperature
1/2 cup (100 grams) granulated white sugar
1 large egg
2/3 cup (160 ml) unsulphured molasses

Confectioner's Sugar: 
2 cups powdered sugar, sifted
1/2 cup unsalted butter, room temperature
1 teaspoon pure vanilla extract
1 1/2 tablespoons milk or light cream
Assorted food colors - if you want your gingerbread men to be colorful.


For the Ginger Bread:

Start by mixing together flour, salt, baking soda, ginger, cinnamon, nutmeg, and cloves, then set aside. 


Next, cream the butter and sugar until light and fluffy. Add the egg and molasses and beat until incorporated. Divide the dough in half, and wrap each half in plastic wrap and refrigerate for at least two hours or overnight. Preheat the oven 350 with rack in the middle of the oven - Line two baking sheets with parchment paper (or use a nonstick cookie sheet) 


On a lightly floured surface, roll out the dough to a thickness of about 1/4 inch. Use a gingerbread cutter to cut out the cookies.  With an offset spatula lift the cut out cookies onto the baking sheet, placing the cookies about 1 inch apart. 


Bake for about 8 - 12 minutes depending on the size of the cookies. Small ones will take about 8 minutes, larger cookies will take about 12 minutes. And if you make really tiny ones like I did, then they take 4 to 5 minutes depending on how soft you like your cookies. They are done when they are firm and the edges are just beginning to brown.  
 
Remove the cookies from the oven and cool on the baking sheet for about 1 minute. When they are firm enough to move, transfer to a wire rack to cool completely.

Confectioners Frosting: 

In an electric mixer (or with a hand mixer), cream the butter until smooth and well blended. Add the vanilla extract. With the mixer on low speed, gradually beat in the sugarScrape down the sides of the bowl and beater. Add the milk and beat on high speed until frosting is light and fluffy (about 3-4 minutes).  Add a little more milk if too dry. Place the frosting in a pastry bag fitted with a decorative tip and decorate the gingerbread men as desired, or just spread the icing on with a tiny spatula.


Monday, November 16, 2009

Spice Cake with Caramelized Pears and Maple Buttercream Icing

I'm not sure how many of you heard, but sadly, Gourmet Magazine has published its last issue. This recipe is one i found in the last ever issue, and it is amazing. Gourmet Magazine, you will be missed.


So as I've mentioned before we're a little broke right now, therefore, instead of giving friends crappy $10 gifts they'll throw away after the obligatory month of display, I'm baking them birthday cakes and they get to take the left-overs. So far - no complaints. My friend Kristy had a birthday last week and managed to get in to Austin and I offered her a cake of her choice. She asked me "umm... is there anything with cinnamon in it?" and I immediately went to my issue of Gourmet Magazine and pulled out this Spice cake. It is, without a doubt, the most complicated recipe I've ever posted. But believe me, it's worth the trouble.


A few notes on the maple buttercream icing: Buttercream icing is actually one of the hardest things I think I've ever made. It's very finicky and you have to be very careful to follow these instructions perfectly, or i promise you will end up with buttercream soup. Also, real buttercream icing has uncooked eggs in it (the eggs do get heated, but not thoroughly enough to kill all possible bacteria), if you are anywhere close to as paranoid as I am then I highly suggest using pasteurized eggs. Also, if you make your buttercream icing the day before you can refrigerate it, however, it will need to be revivied. Buttercream icing can actually be refrigerated up to 1 week in advance. The trick to reviving it is to bring it all the way to room temperature (you can put it over a warm water bath) then to whip the hell out of it. Seriously, on super high speed, for at least 2 or 3 minutes, possibly longer.

For Spice Cake:
2 2/3 cups all purpose flour
2 1/2 tsp baking powder
1/2 tsp salt
2 tsp cinnamon
1 tsp ground ginger
1/2 tsp grated nutmeg
1/4 tsp ground cloves
1 cup whole milk
1 tsp pure vanilla extract
2 sticks unsalted butter, softened
2/3 cup granulated sugar
2/3 cup packed dark brown sugar
5 large eggs

For Caramelized Pears
2 1/4 lb Bartlett or Bosc pears (about 5)
1/2 stick unsalted butter
1 tbsp granulated sugar
1 tbsp fresh lemon juice
2 tbsp brandy

For Maple Buttercream
4 large egg whites at room temp for about 30 minutes
1/2 tsp cream of tartar
1/4 tsp salt
1/4 cup maple sugar (this can be found at Whole Foods, although it's a little expensive, you can also make this, ask me if you're curious)
1 1/3 cups pure maple syrup
4 sticks unslated butter, cut into tablespoons and softened.

The Gourmet Magazine suggests using 3 (8-inch) round cake pans, but I didn't have any, so I used 2 9-inch round cake pans and adjusted the cooking time slightly.

Spice Cake:
Preheat the oven to 350 with rack in the middle and butter and flour your cake pans. (Cake can be made 1 day ahead and wrapped in plastic wrap, at room temp).
Whisk together flour, baking powder, salt, and spices in a large bowl. In a separate small bowl stir together milk and vanilla.
Beat butter and sugars with an electric or stand mixerat medium-high speed until pale and fluffy, about 3 to 5 minutes. Then add eggs 1 at a time, beating well after each addition. At low speed mix in flour mixture in 3 batches, alternating with milk/vanilla mixture (beginning and ending with the flour mixture) and mixing until just combined.
Divide batter among pans, smoothing tops, then rap the pans on the counter to eliminate any air bubbles (or you can have fun and make a lot of noise like me by dropping them on the counter from several inches up). Bake until pale golden and a wooden pick inserted into center of cakes comes out clean, 25 to 30 minutes for the 3 8-inch pans, or about 20 minutes for the 2 9-inch pans. Cool cakes in pans on racks for about 10 minutes then run a knife around the edge of pans and invert cakes onto racks. Turn right-side-up and cool completely.


Caramelized Pears:
Peel and core pears, then coarsely chop (or make your husband/boyfriend/significant other do this).
Heat butter in a 12-inch heavy skillet over medium-high heat until foam subsides*, then saute pears, stirring occasionally, until just beginning to brown, 2 to 3 minutes.Stir in the sugar, lemon juice, and brandy - cook over high heat, stirring, until juices are deep golden and pears are tender, about 5 to 8 minutes.

*really that means until the butter has just completely melted, otherwise you'll burn it and have to toss out the first try like I did.


Maple Buttercream:
(just a reminder, please, please, make sure your butter is completely at room temp)
Beat egg whites with cream of tartar and salt using cleaned beaters at medium speed until they just hold soft peaks. Add maple sugar a little at a time, beating, then continue to beat until whites just hold stiff peaks.
Boil maple syrup in a small heavy saucepan over medium heat, undisturbed, until it reaches "soft-ball stage" (That's around 238 to 242 on a candy thermometer) - about 3 to 7 minutes.
With mixer at a low speed immediately pour hot syrup in a very slow stream down side of bowl in to egg whites, then beat at high speed scraping down side of bowl occasionally with a rubber spatula, until meringue is cool to the touch, about 6 minutes. It's really important that the meringue is cool, if you need to, put the bottom of the bowl over an ice bath for just a minute or two.
At medium speed add butter 1 tbsp at a time, beating well after each addition (if the buttercream is still soupy after about half the butter is added, then it's time for the ice bath). Continue beating until buttercream is smooth - it's okay if the mixture looks a little curdled before all the butter is added, but it should come together before the beating is finished.


To assemble the cake:
Put 1st layer on serving plate (can use pieces of aluminum foil to prevent getting icing on the plate) then spread with buttercream and top with pear filling (half or all depending on how many cakes you made). Top with second cake layer and either frost cake with remaining butter cream, or repeat with another layer.


Tuesday, November 10, 2009

Nigella Lawson's Doughnut French Toast

If there is one thing that I really love, it's NPR. I know it's really dorky, you don't have to tell me. But the other day I stumbled across an NPR interview with Nigella Lawson on eating well. This does not necessarily mean eating healthily. This is not to say that the two cannot or do not overlap. However, it is absolutely a wonderful feeling to sit down with a plate of something utterly delicious in front of you and not wonder "how many calories are in this?" Eating well is about enjoying your food.

So anyway, in this radio interview, Nigella has brought some of her food for the host to try, and he's eating while he's talking to her. Just listening to him eat this french toast I was absolutely famished, he couldn't even finish a sentence, he kept making yummy noises and getting caught with his mouth full. Naturally, I had to have this french toast that was so delicious it prevented the NPR radio host from having coherent conversation. When my friend Jess came to stay with me this weekend I decided it was the perfect opportunity. It was rich, eggy, and sugar crusted. In short, all that I could have asked from a recipe entitled 'doughnut french toast.'

Doughnut French Toast:

2 eggs
1/2 cup full fat milk
4 teaspoons vanilla extract
A couple of slices of bread
1-ounce butter (for frying)
1/4 cup sugar

Beat the eggs with the milk and vanilla in a wide shallow bowl.


Soak the bread halves in the eggy mixture for a couple of minutes on each side.
Heat the butter in a frying pan/skillet, fry the egg-soaked bread until golden and scorched in parts on both sides.


Put the sugar onto a plate and then dredge the cooked bread until coated like a sugared doughnut.